My mom asked me to come home a few weeks early for Christmas to help her get the house ready for our entire family (10 adults and 4 kids under 2) to be there for the holidays. She gave me free reign on decorating and baking. The prospect of having all the resources of her house—and yard—at my disposal to decorate with was the best Christmas gift she could have given me.
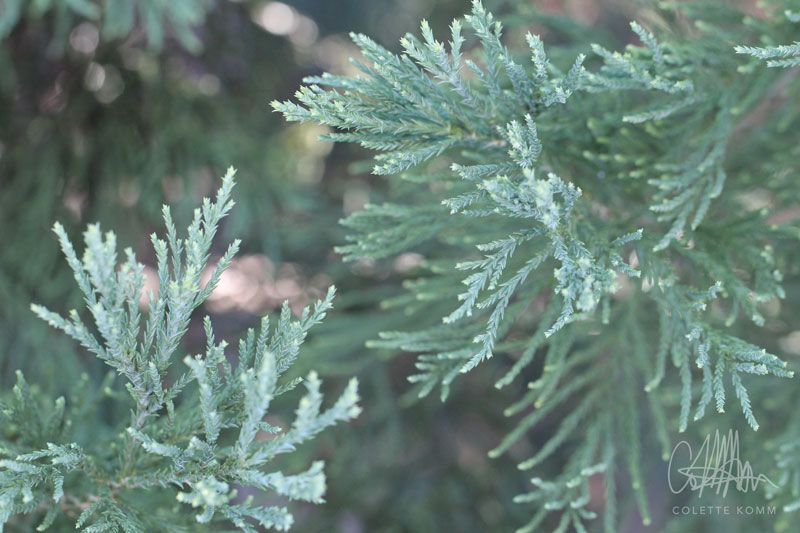
My parents, who have lived in their house longer than I’ve been alive, have a yard with lots of beautiful, mature evergreens, which I never appreciated as a child; I had always wanted flowers like Grandma and Grandpa Komm’s, which they planted from seed each spring in their little greenhouse on the prairie. But Mom was—and still is—all about evergreens and conifers: the shapes, textures, and shades of green that thrive so abundantly in the temperate rainforests of coastal British Columbia.
 Although my love for flowers has never waned, I’ve grown to appreciate what my mom sees in her evergreen gardens. Living in New York for 15 years, where everything is grey all winter long, has helped me see what I really had growing up.
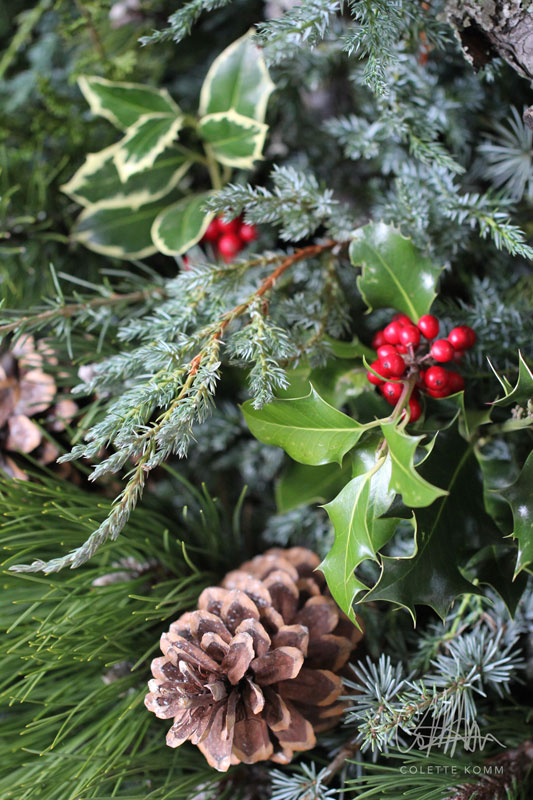
As soon as I got home—and it stopped raining—Mom and I walked around the yard with our pruning shears and she pointed out all the best trees and shrubs. I was fascinated to learn all the names and defining characteristics of these plants I’d seen all my life but never really paid attention to. We collected giant buckets of blue spruce; three or four types each of juniper, cedar and pine; and cotoneaster with beautiful red winterberries. What few deciduous trees there are in the yard seem to have been chosen for how exceptional they look with no leaves; we collected twisted hazel and red twig dogwood on subsequent trips.
 Using the garage as my workspace, I made so many piles of different branches that I had to park one of the cars in the driveway for a day or two to make room for all the organized chaos. A garage has never smelled better than this one, full of freshly cut evergreen boughs. You’d actually want to go sit in there because it smelled so good!
I spent hours and hours walking and foraging in the woods nearby. I can’t believe this was the first time in 33 years that I’d really paid any attention to the things that grow—even in the dead of winter—right where I grew up! Walking beneath the forest canopy, even though it was the end of December, you could have easily thought it was summertime; everything was green and lush.

Along the way I collected some amazing specimens: salal, a native evergreen bush that makes excellent filler and which you’ve probably seen or bought in flower arrangements; European holly, an invasive species, whose utility in Christmas decorating goes without saying, and, most serendipitously, a rogue boxwood shrub, bushy as can be with long, long stems of shiny little scooped leaves—perfect, because the boxwood in my mom’s yard are all trimmed into meticulous little pom-pom topiaries and were off limits to my clippers.
 My original plan had been just to make some table centers for Christmas dinner and a wreath for the front door. Especially a wreath.
But Spoiler alert: I never got around to making that wreath. When I get into my creative zone I let it take me wherever it wants to go and there were too many other exciting things for me to make…
 I started with the dining room table. I thought I knew exactly what I wanted to do: a 21st century send-up of the classic 1980’s table centers my mom used to make at Christmas when I was little and which would be instantly recognizable to my brothers and sisters: 3 staggered candles sticking up from an oblong display of carnations, chrysanthemums, baby’s breath, and evergreen foliage from the yard with those little glittery miniature wrapped presents on a stick poked in here and there for accent. (Which was the inspiration for what I made for Thanksgiving dinner at my sister’s.) But that was before I rediscovered just what a treasure trove my mom’s house was. (It’s quite amazing what you can store in your home when it’s not a tiny Manhattan apartment!)
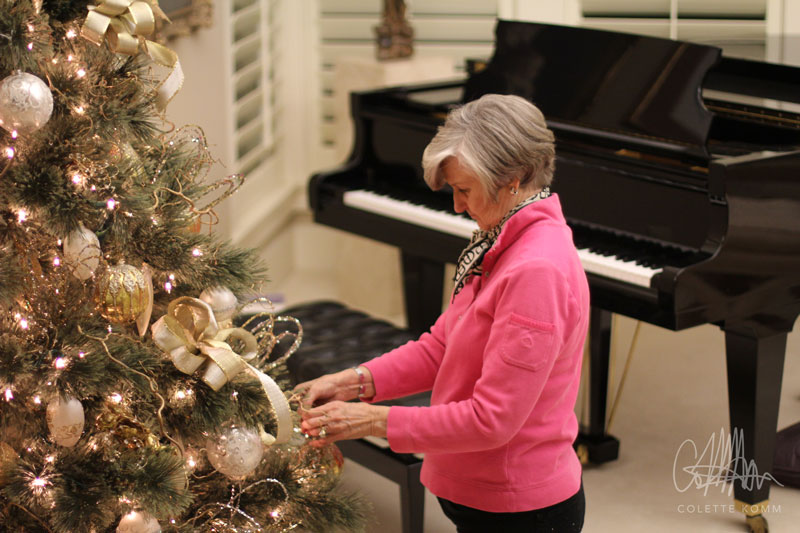 While my mom decorated her tree in the living room I walked around the house to take inventory of the kind of vases and containers I could use to arrange stuff in. I kept finding candlesticks—gold ones, brass ones, silver ones, crystal ones—hidden away in my old bedroom closet, the basement, and random cupboards; some of them I could even remember being in the living room from my earliest memories and each set brought back memories of what room they had originally been displayed in and what the house had looked like at the time.
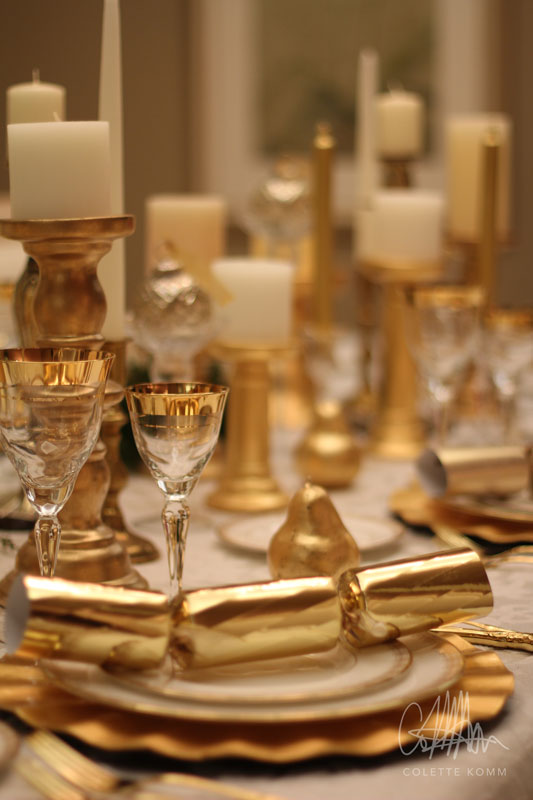
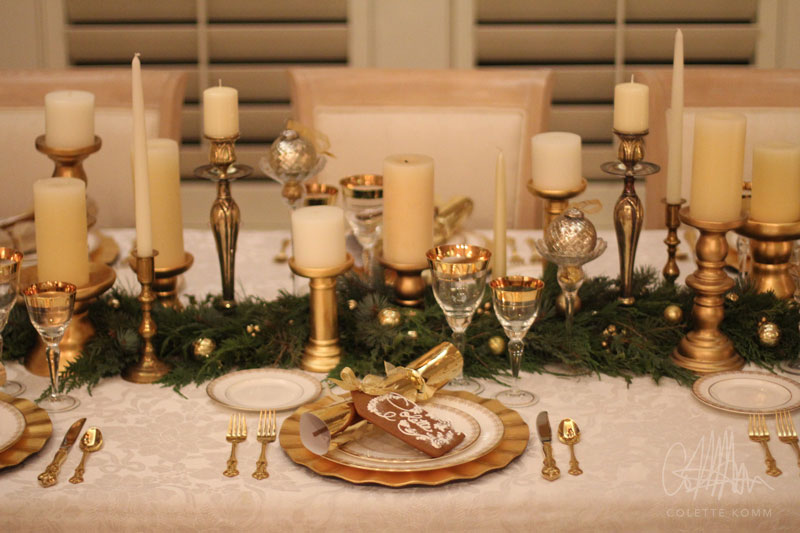
After setting them all on the dining room table to see them all in one place, I threw out my original idea for the table center and decided that 40 years worth of accumulated candlesticks should trigger sufficient nostalgia amongst my siblings. It was then obvious to use the gold china, flatware and rimmed goblets, which meant I didn’t have to polish the silverware. I carefully set the full table with all the place settings to see how much space was left for the greens: just enough to run a garland in between all the candlesticks.
 I worried—but only for a moment—that a table completely covered in gold might be a little much, but then decided if there was ever an excuse to go completely all-out and over-the-top it was this Christmas and I was going to do it! 2015 was the biggest year ever for our family; my parents got two new grand-babies and a son-in-law, so we had plenty of reasons to celebrate.
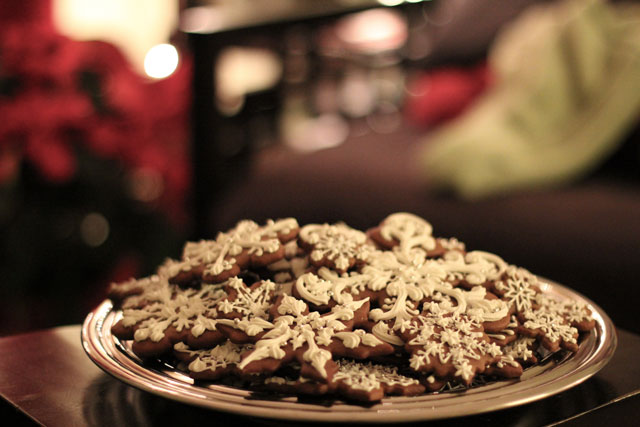
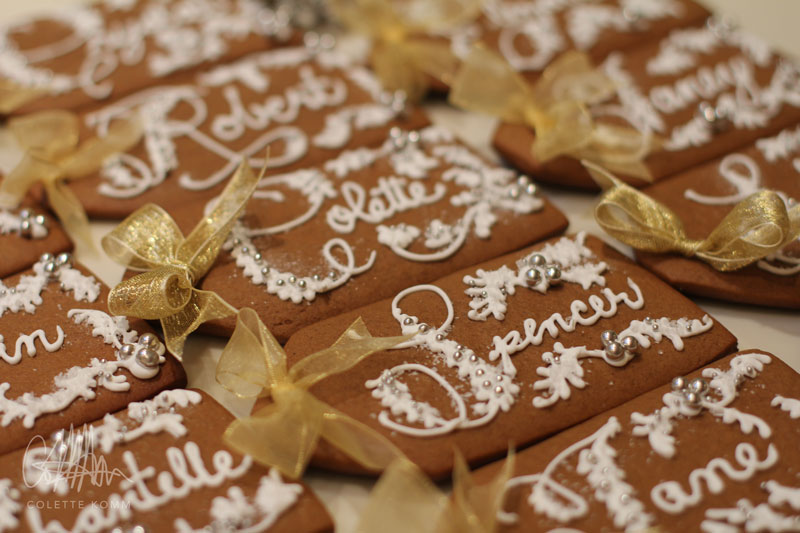 For the place cards I made each person (even the brand new babies) a gingerbread cookie “gift tag” attached to a Christmas cracker. I did this years ago but with a different lettering style. This time around I stayed up late the night before designing and practicing the capital letters in ink before piping each name in icing calligraphy.
 I made about 8 or 9 feet of garland that ran the length of the table and snaked and curved around all the candles, and a matching 12 foot garland that I draped around the chandelier above the table. I love making garland, it’s like knitting with greenery. I get into my happy OCD repetitive zone for a while and all of a sudden there’s this big long ribbon of something beautiful to show for it.
 Once I’d completed the dining room, I went to work on that wreath I’d been dreaming about. But this is what I ended up making for the front door instead:
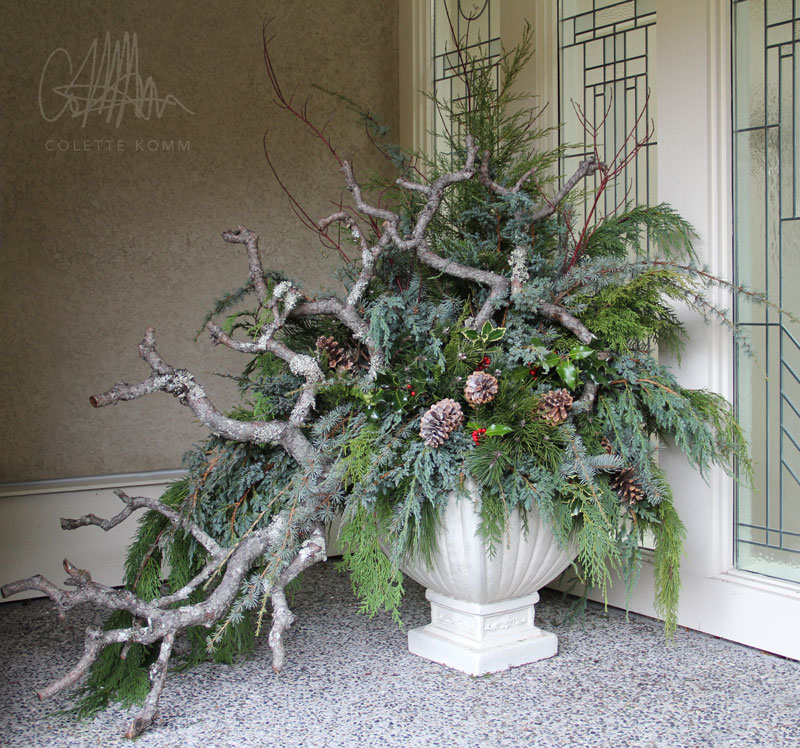 I discovered this bizarre pile of tree branches hidden outside, which used to be some of the Austrian pine topiaries in the front yard that died a few years ago and my dad cut down. He saved some of the horizontal branches in a pile—which he proudly called modern art—and left it exposed to the elements. I knew I had to use them in my decorating; they were covered in delicate, lacy lichen and their shape was a perfect arboreal approximation of antlers.

The large scale of the Austrian pine branch necessitated another trip to the yard, this time with bypass loppers instead of pruning shears to get long enough branches to work with it. The final arrangement was huge—about 5 feet wide and over 5 feet tall—but it fit perfectly in the alcove next to the front door, making a wreath unnecessary. (I’ll save my wreath idea for a year that I go home and don’t have an extra week-and-a-half to deck the halls.)
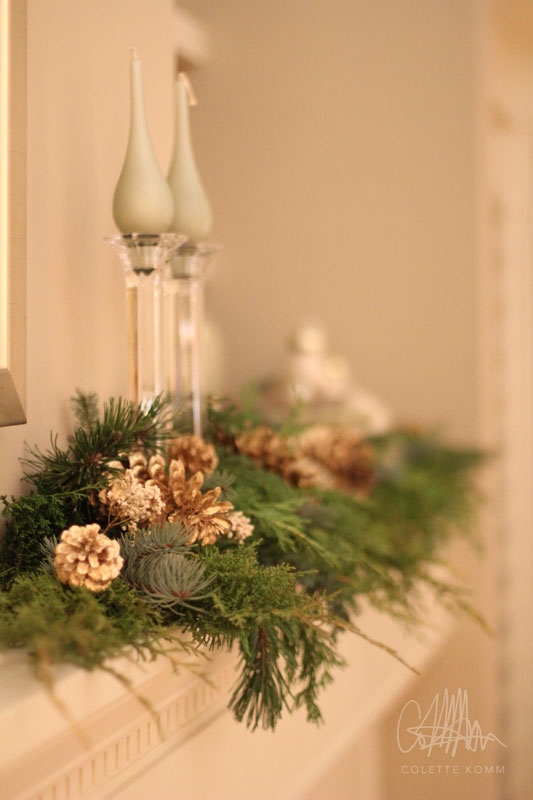
With the two biggest decorating objectives out of the way I turned my attention to the rest of the interior stuff. My mom saw how much fun I was having and remembered how much fun she used to have doing the same thing and wanted to get in on the action, so I let her decorate the mantle in the family room—for old time’s sake. (Who am I kidding, what really happened was that she said, “Colette! You’ll never finish all this by yourself and you still have all those cookies to bake and all this mess to clean up before everyone starts showing up!”) Regardless of whose side of the story is told, she wanted to decorate the mantle and had a lot of fun doing it; we both get our jollies out this kind of stuff.

While mom did the family room I worked on the arrangements for the rest of the house.
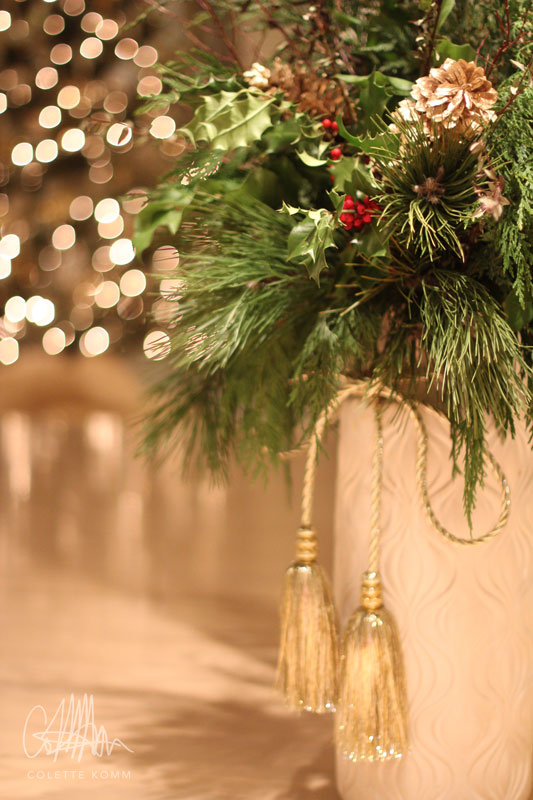
The arrangement I made in the hallway gave you a glorious whiff of cedar every time you walked past it. That is what Christmas is all about!

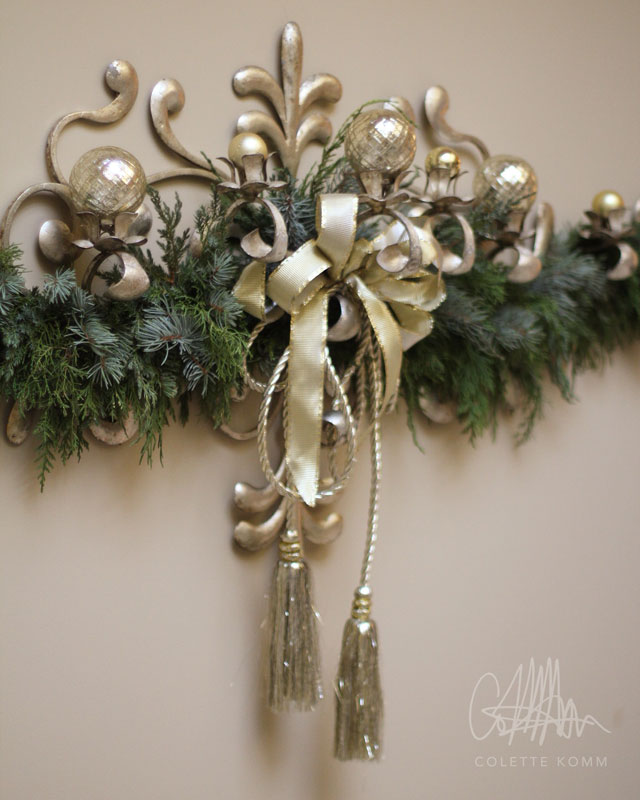
I enjoyed making the garland for the dining room so much I made more for the wall candelabra above the staircase. And given the number of candles on the dining table, opted to fill it with Christmas balls instead.


After we thought we were all done and I was taking photos of the orchid in the living room I discovered the best of all the vases hiding on the bottom shelf of the tea cart: a brass Persian teapot. I couldn’t believe I hadn’t it found on my initial reconnaissance trip around the house; it’s one of my favorite things of hers and it was the perfect vessel to hold my last sprays of holly and boxwood.
 Oh, and one more Spoiler Alert: We got all the Christmas baking done on time too.

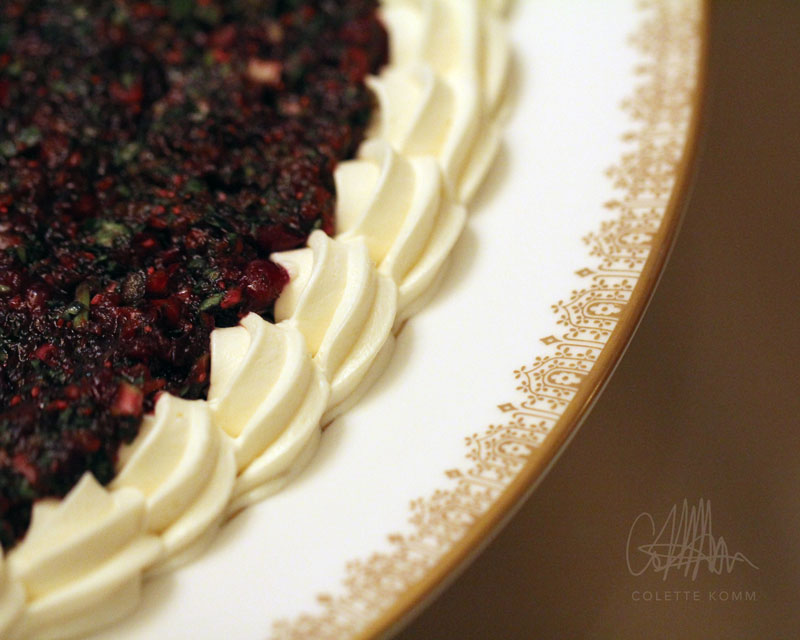
I even made time to class up the cranberry salsa by serving it on a china plate and piping the cream cheese!
 And no matter how fancy the house was decorated it wouldn’t have been Christmas without me making my gingerbread snowflakes. I had to stay up all night to make them and polish the silver serving platter, but it was well worth it. It was our best family Christmas ever and certainly the most creatively fulfilling one for me!

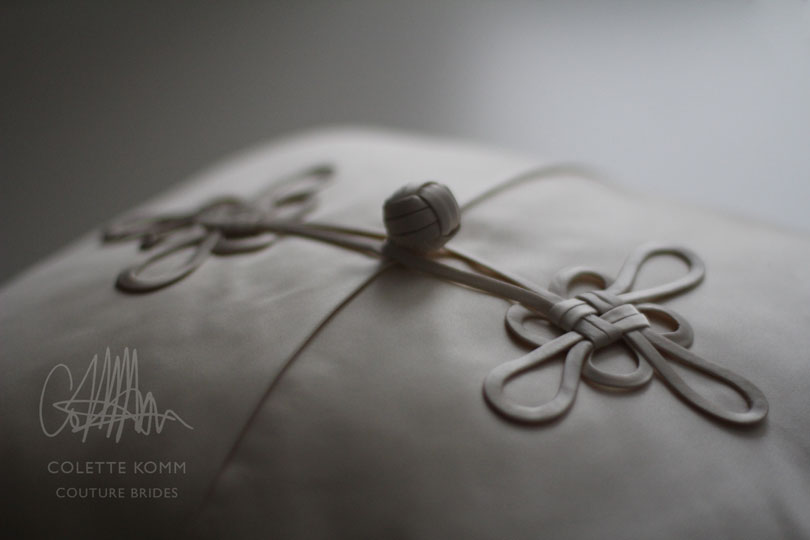 My last post was about the first pillow I ever made. This post is about the last pillow that I made (perhaps latest is the better word to use, since I’m sure I’ll make more in the future). It also involves a mother—this time not mine, but one of my brides’— as well as a surprise gift: a first wedding anniversary gift for her daughter. And, thankfully, the craftsmanship of this pillow is markedly improved over the first one!

 I thought it was a great idea, and was flattered to be looped into another important milestone in this wonderful family’s life. This is what I love about my job: that I get to do this thing that I absolutely love to do which creates something with so much meaning and significance for my clients and their families.
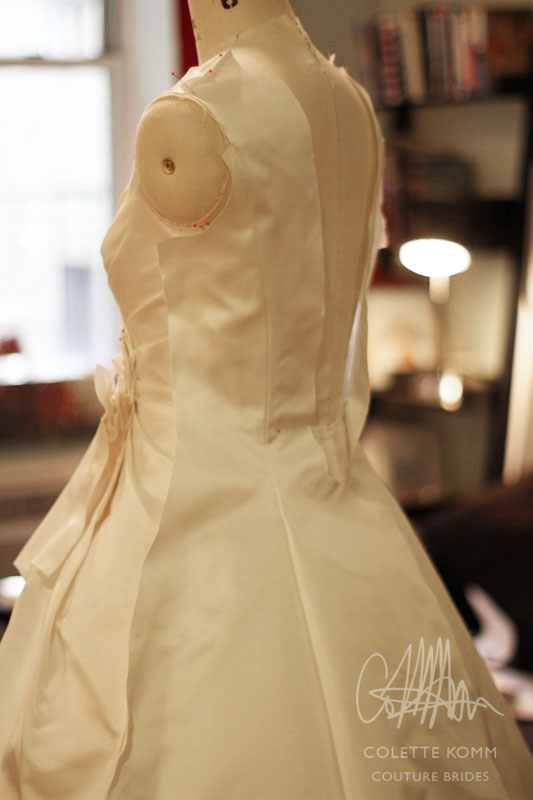
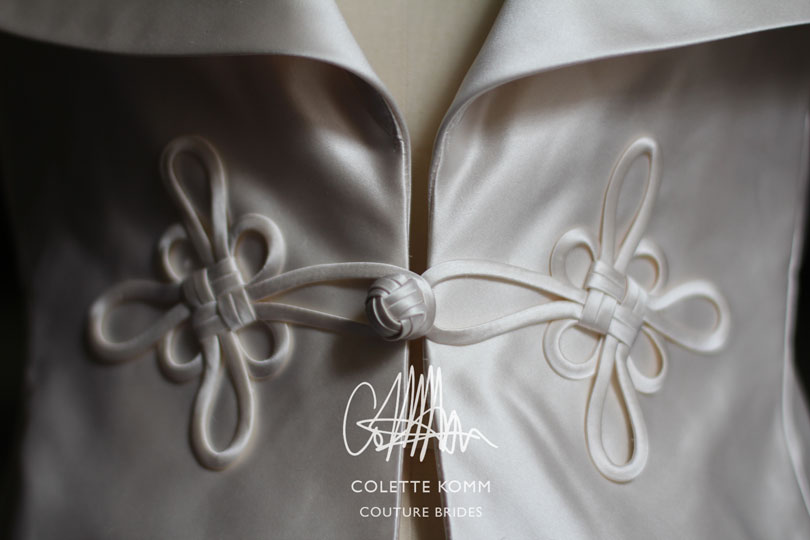 When designing the original gown (which I’ll devote an entire post to in the future—for now I’ll just stick to the frog parts) I researched Chinese knots and chose a good luck knot to recreate in the same Italian silk duchess satin as I made the rest of the gown. The button is a monkey’s fist knot.
 If you’re one of my past brides and you’d like a keepsake pillow made with the leftovers of your fabric, or if you’re a future bride and you like the idea of a ring pillow made made to match or compliment your dress, let me know!

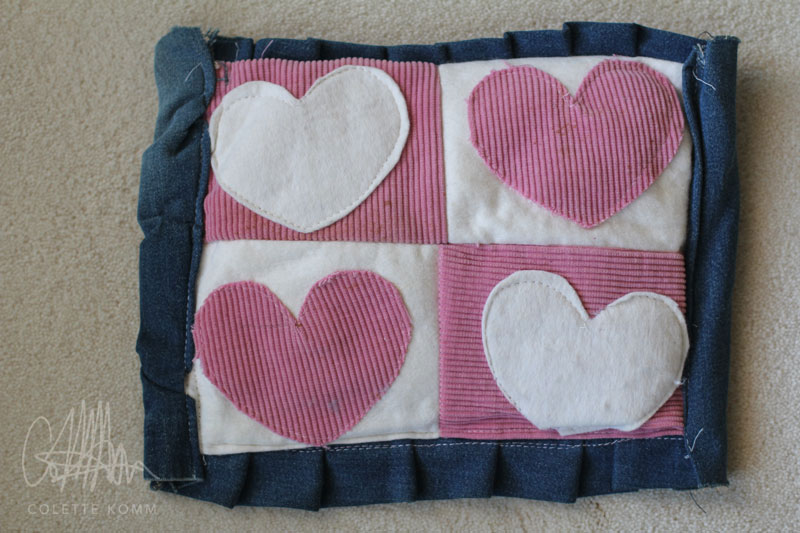 It’s a pillow I made as a Mother’s Day gift for my mom when I very first started sewing. It was the first non-Barbie-clothes thing I ever made, and it is The Most Important Thing I Have Ever Sewn because it taught me the importance of craftsmanship and construction in relation to design.
 I put a lot of thought into the design, but even more heart; both literally and figuratively, as you can see! Limited by what fabric was available in the scrap drawer, I chose white felt, which was leftover from when my mom made me lamb’s ears to wear as a three year old when I was one of the stable animals in the Christmas party nativity scene; pink corduroy, from a pair of old pants I had grown out of; and denim that had most likely been my dad’s yard-work pants, or at least used to patch my dad’s yard-work pants, I’m not sure.
 Sewing multiple layers of denim is a pretty ambitious task for anyone, let alone an 8 year old novice, but I wasn’t going to let my inexperience get in the way of making a sumptuously ruffled edge for my pillow. You can tell that I constructed the top and bottom ruffle first because, a) they’re sewn inside the seam, and b) there is actually some semblance of a ruffle; by the time I got to the vertical sides of the pillow I had run out of fabric and there was just barely enough to cover the last side, with not a single pleat and no folded edges to hide the frayed raw edges of the denim.
 When I had it all finished I was so proud of this beautiful thing I had made to show my mom how much I loved her and I just knew she would love it too! She would think it was the best gift ever and be so proud of it and show it off to all of her friends.
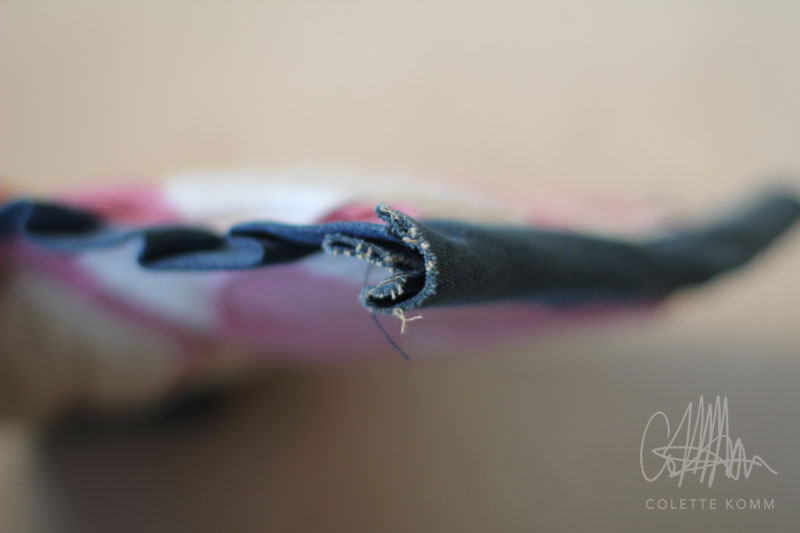 What did come, however, was the pillow— right back into my bedroom! My mom put it in there, assuming I had accidentally left it in her room, as if it was one of my toys I’d forgotten to clean up. I was devastated, and brought it back to her, telling her that this was my Mother’s Day gift and that I had made it for her to put on her bed.
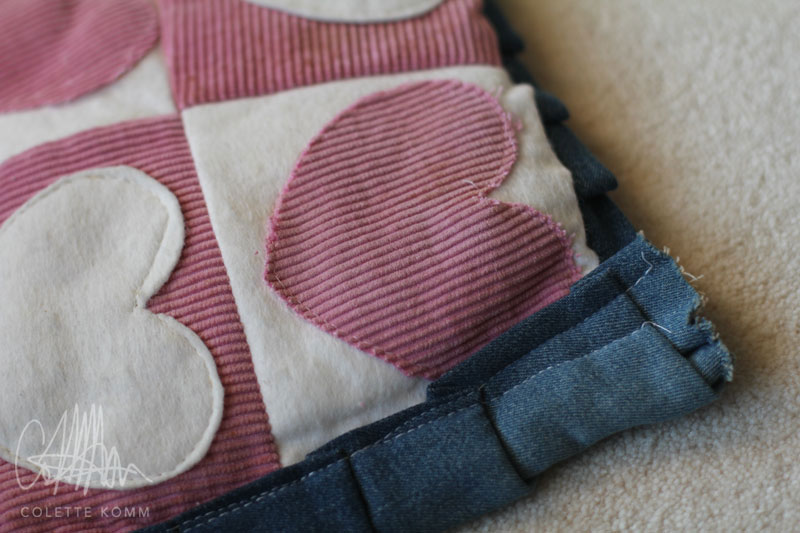 So the Freudian subtext of this story is that I’ve spent the rest of my life sewing maniacally to prove to my mother that I can make something worthy of her praise and adoration, but the more accurate take-away from this experience is that I learned at an early age that it’s not enough to have a great idea, or to be well intentioned in your creative endeavors—you also have to be able to execute your idea at the requisite level.
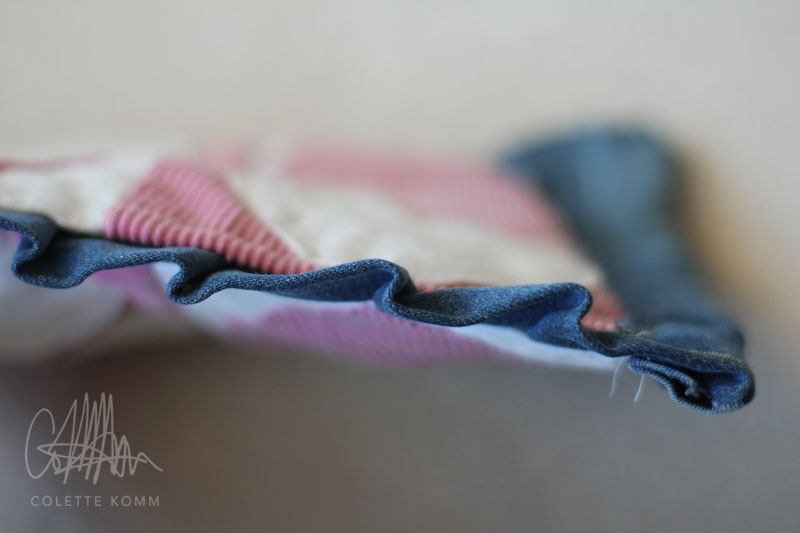 I love my mom and everything she’s done for me in my life. She’s my biggest fan and greatest champion, and I owe so much to the many wonderful things she’s taught me, the sacrifices she’s made for me and my four older siblings, and the constant love and support she provides for our family.
 A week before the party—after a fruitless brainstorming phone call with my out-of-state best friend— I went to bed, catastrophizing that I would have to cancel my birthday party on account of not being able to come up with a suitable birthday cake idea. But around 1 A.M. the inspiration hit, and I was wired until 4 A.M., mentally constructing the perfect birthday cake(s), amazed that the combination of frustration and sleep deprivation had conspired in my favor. Not only did I suddenly have a solution, but it incorporated all of my possible ideas!
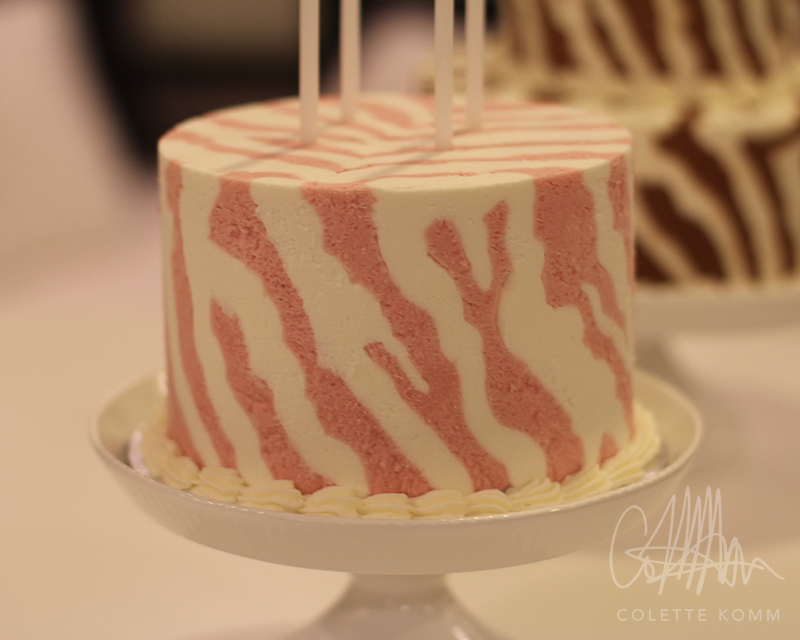
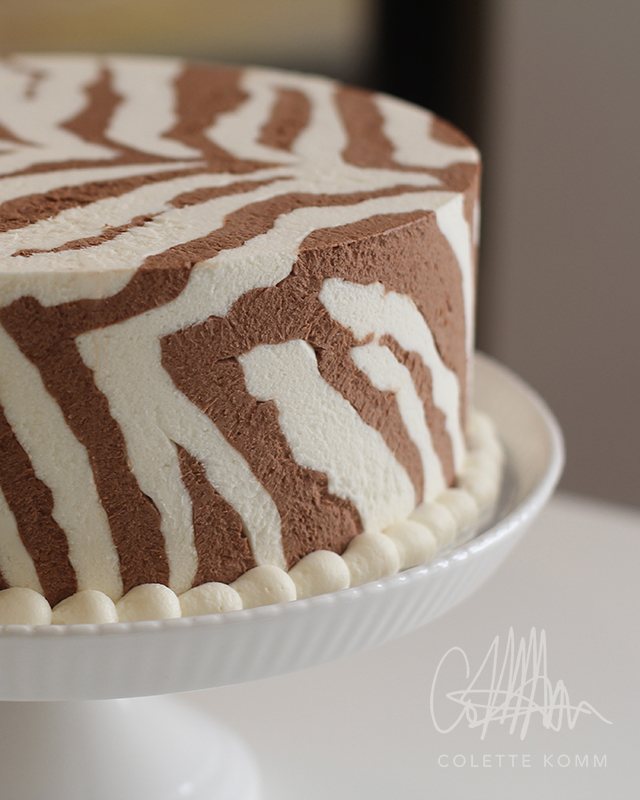
 And the second zebra striped cake would be strawberries and cream, with the pink strawberry stripes hinting at the pink from my
 The frozen strawberries and cream cheese cake started with the recipe for what my family has always called “Favorite Dessert,” but a google search of the ingredients will tell you is actually called “
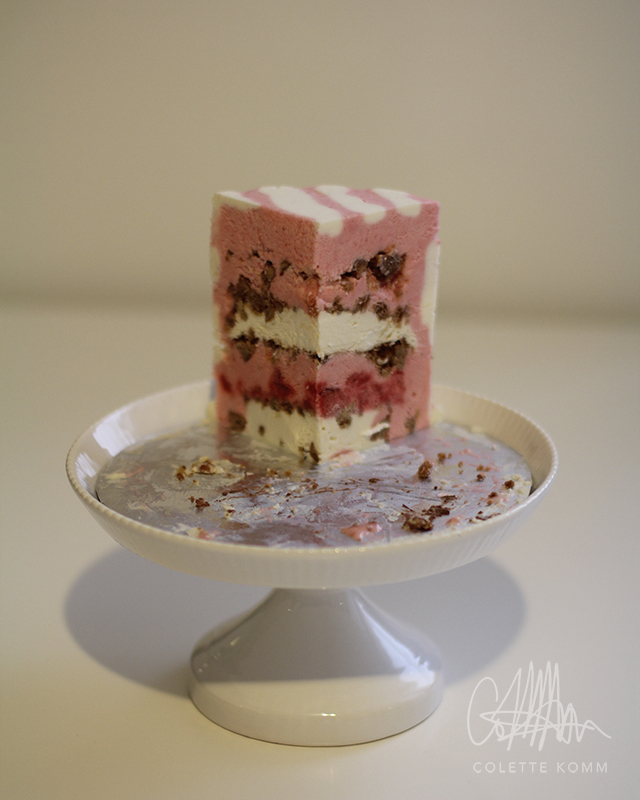

 To actually make the cakes, first I had to decide how big to make them. I experimented with different sizes by cutting the plastic lining that I would pipe the mousse into and taping it into circles until I’d deterimined the sizes I wanted. Since the strawberry cake had to be frozen it could only be as big as I could fit in my freezer, but the chocolate mousse cake could be larger and multi-tiered since it only needed to be refrigerated.
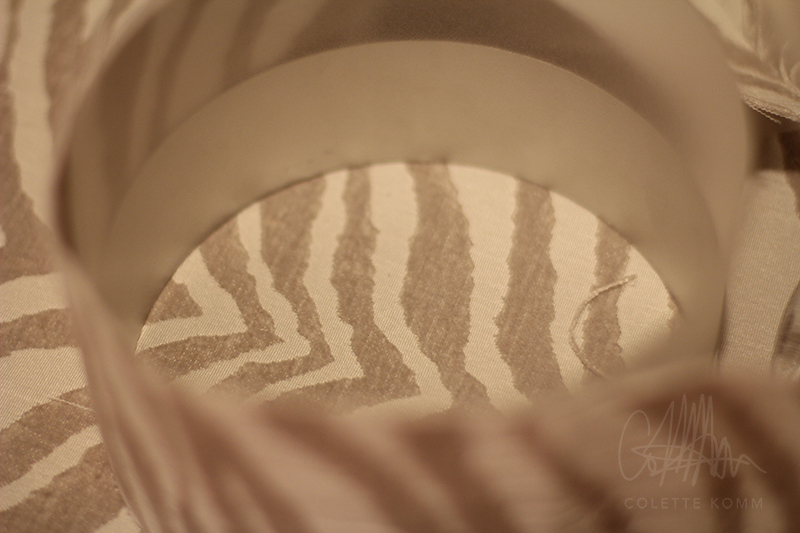 I fiddled around with the zebra fabric scraps to choose the direction I wanted the stripes to go on the cakes.
 With the pastry rings lined with the plastic sheets I piped the zebra stripes from piping bags filled with the different fillings and didn’t finish until about 6 A.M. the day of the party. (I had to stay up all night to make the cakes so they had enough time to set up before being un-moulded.)


 When I first met Avi she told me the sweetest story of how her fiancé had proposed to her: he had taken her on a surprise trip to Morocco to get in touch with her Moroccan roots, tracked down the mud-brick home where her father (who passed away when she was a younger) had been born, and that’s where he asked her to marry him. The trip had made an indelible impact on her and as she began to plan her wedding decided she wanted to honor her Moroccan heritage in her wedding dress; not only as a tribute to her father, who would not be there to see her get married, but as a wedding day thank-you surprise to her husband for sparking a new appreciation for her family’s origins. [SIDENOTE: Shout-out to her husband for being so awesome!]
 I asked if she had any Moroccan family heirlooms that I might be able to see for design inspiration and after some thought she mentioned an embroidered caftan that her Moroccan grandmother had given her when she was little and which she wore as a child. The only problem was she didn’t know where it was or even if it still existed!
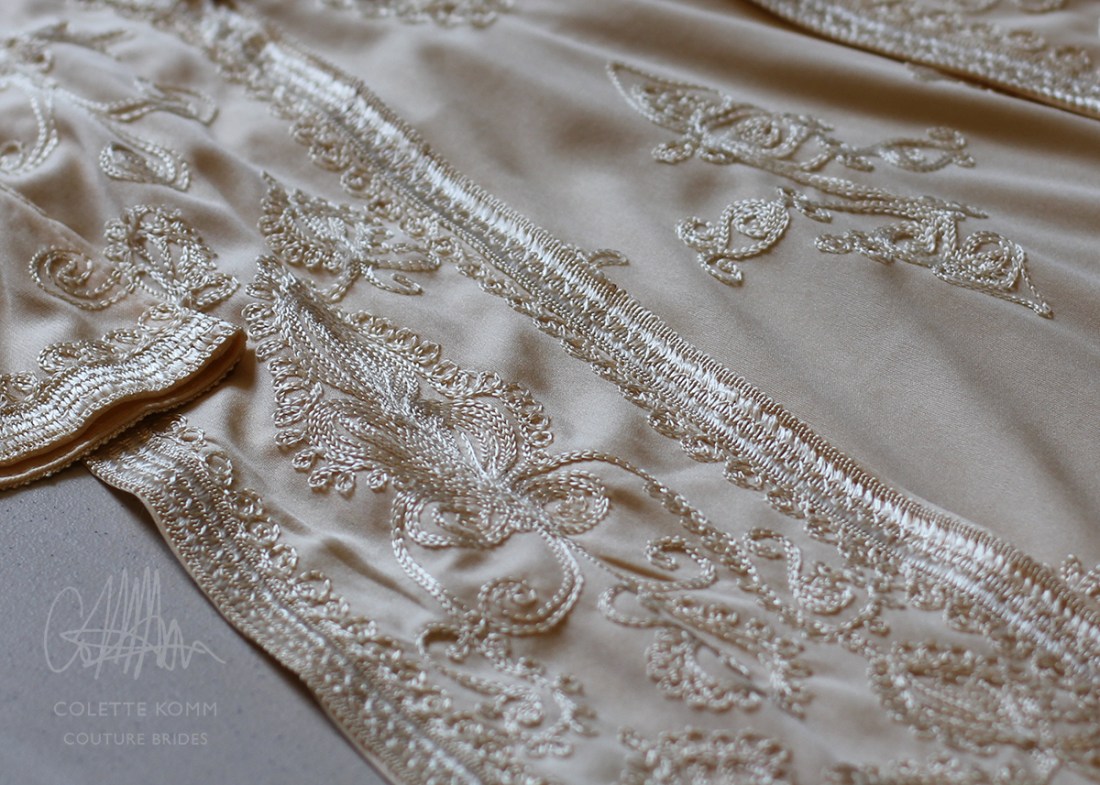 A phone call to her mother in Pennsylvania solved the mystery of the Moroccan caftan (I wonder if that’s a Nancy Drew book?). It was in a box in a closet somewhere, her mother was sure, and she would bring it with her next month when she came to New York to join Avi for her next appointment with me. Perfect!
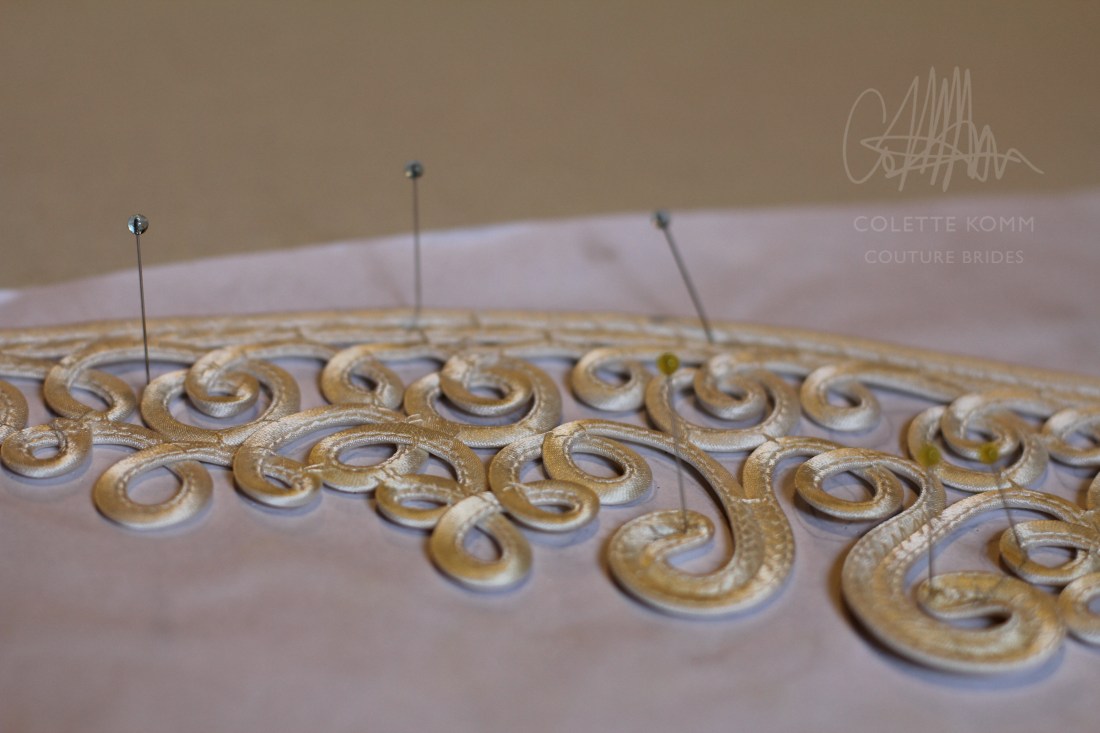
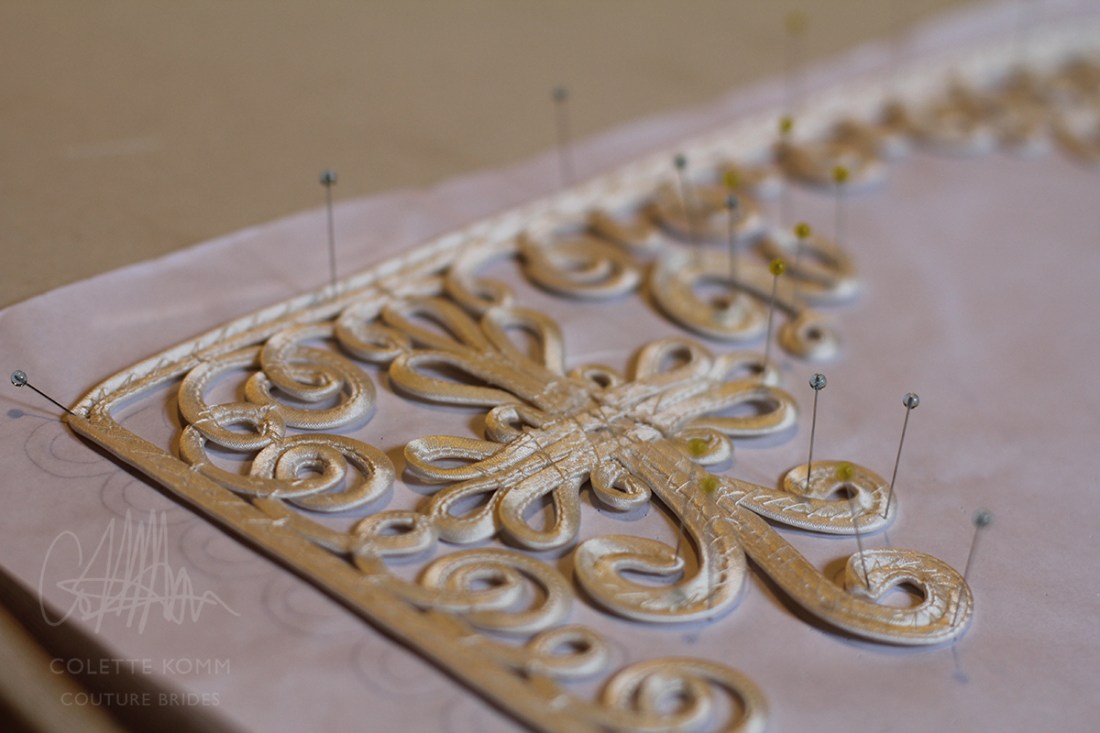
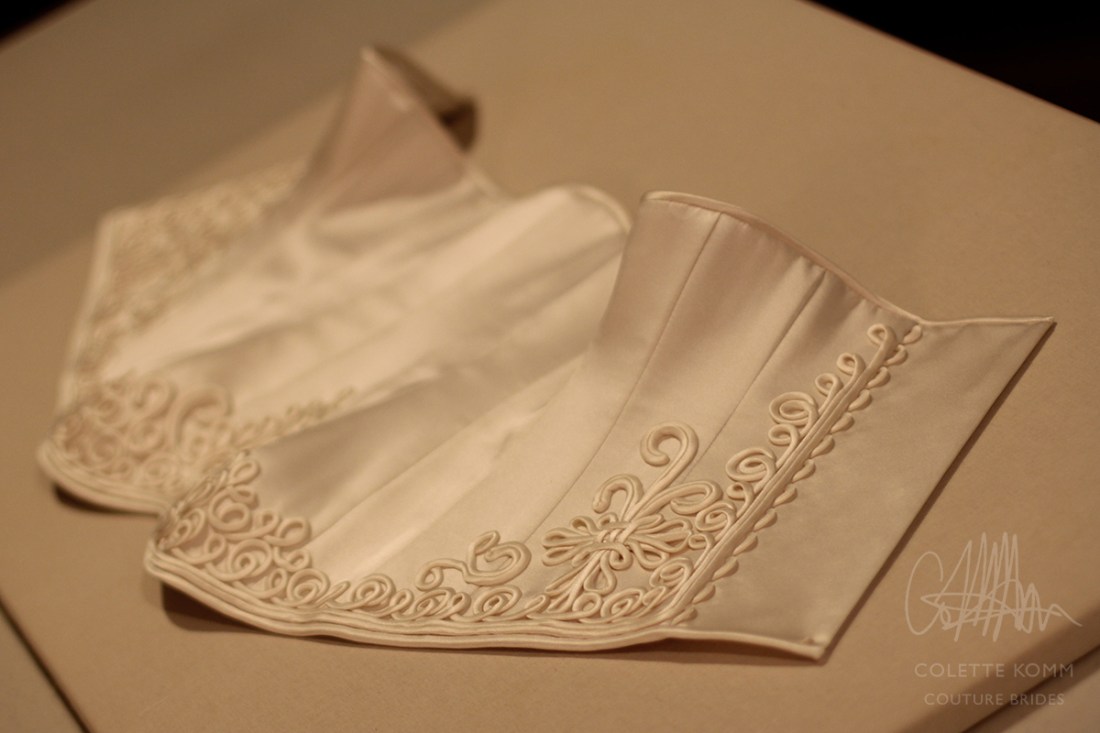
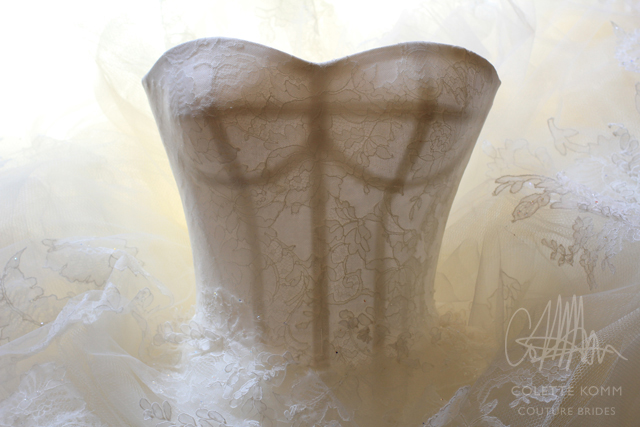
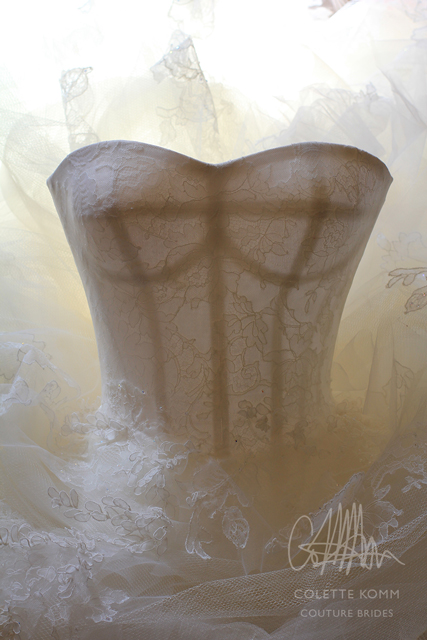
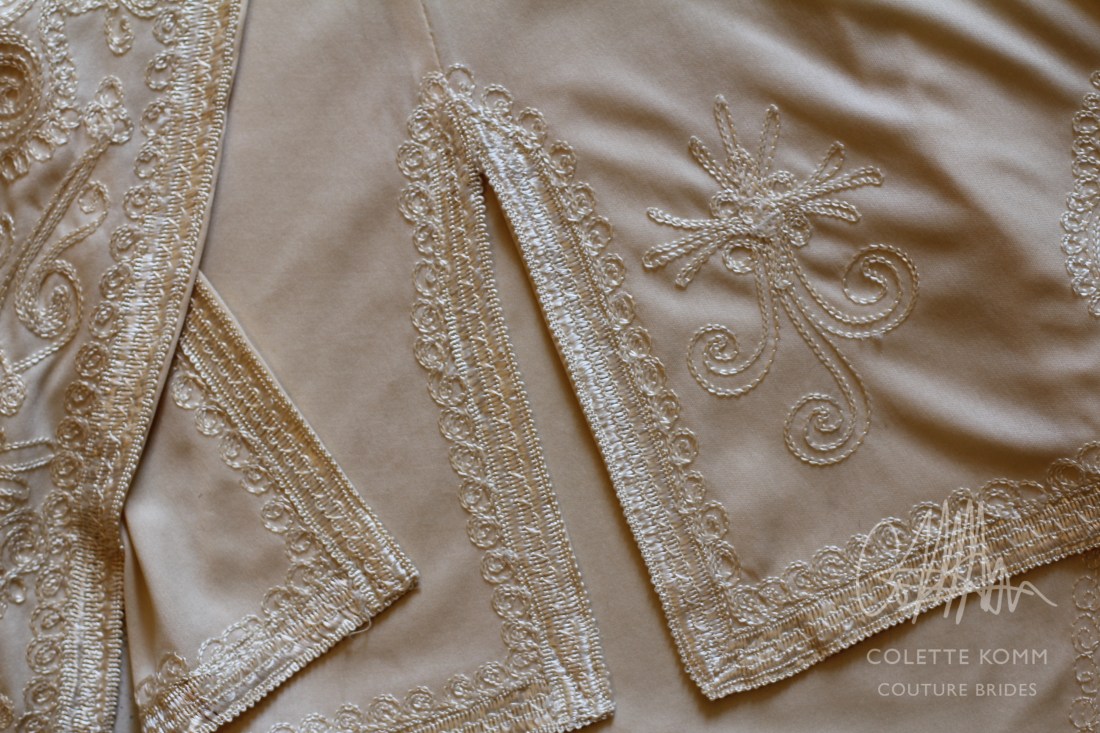 I was really excited to see the caftan up close when Avi came back with her mother a few weeks later. Ever since the design consultation I’d been thinking about a technique that I’d always wanted to use on a wedding dress that would be the perfect vehicle to incorporate Avi’s Moroccan heritage in a subtle but significant way: I would reinterpret the embroidered motifs on the caftan using intricate hand-sewn bias applique. The scale and method would be different, but the scrolls and motifs would come straight from the caftan. Something new from something old, and perfectly unique to Avi!
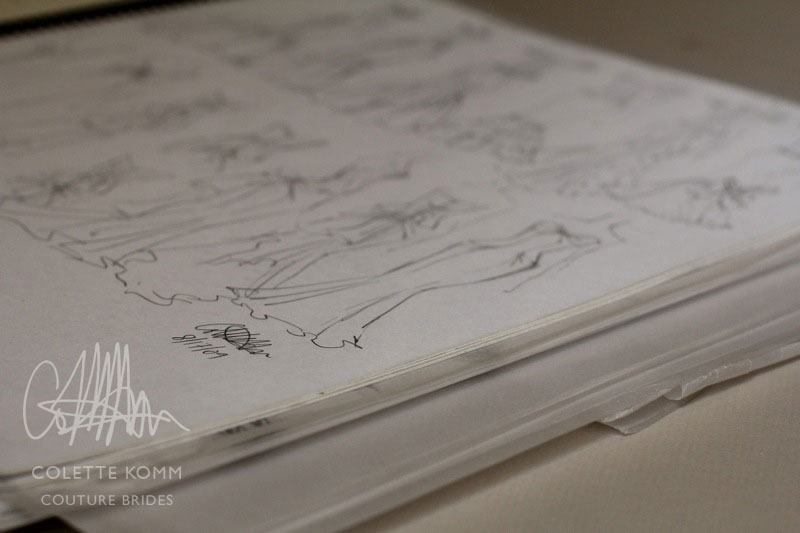
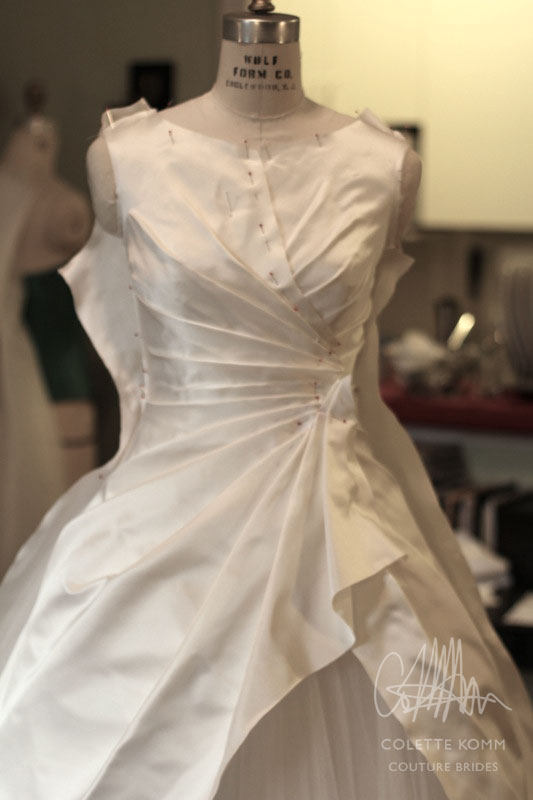
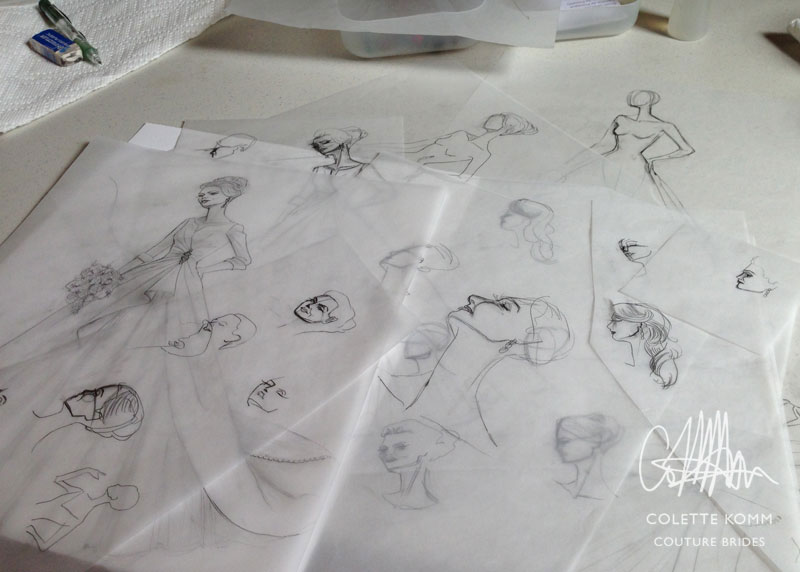
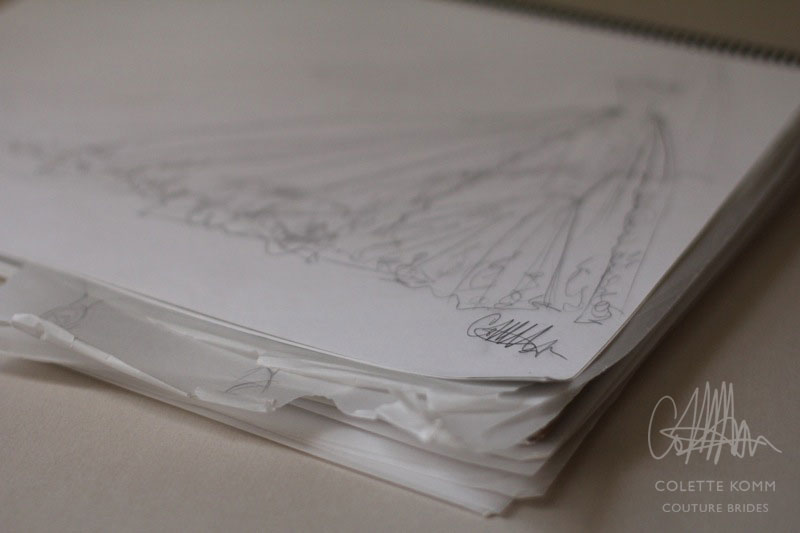
 To do the applique I first “draped” some ideas on the mannequin and made some fabric treatment samples, deciding which elements from the caftan would be best articulated with the bias applique. Then I drew out the whole border in pencil, to scale.
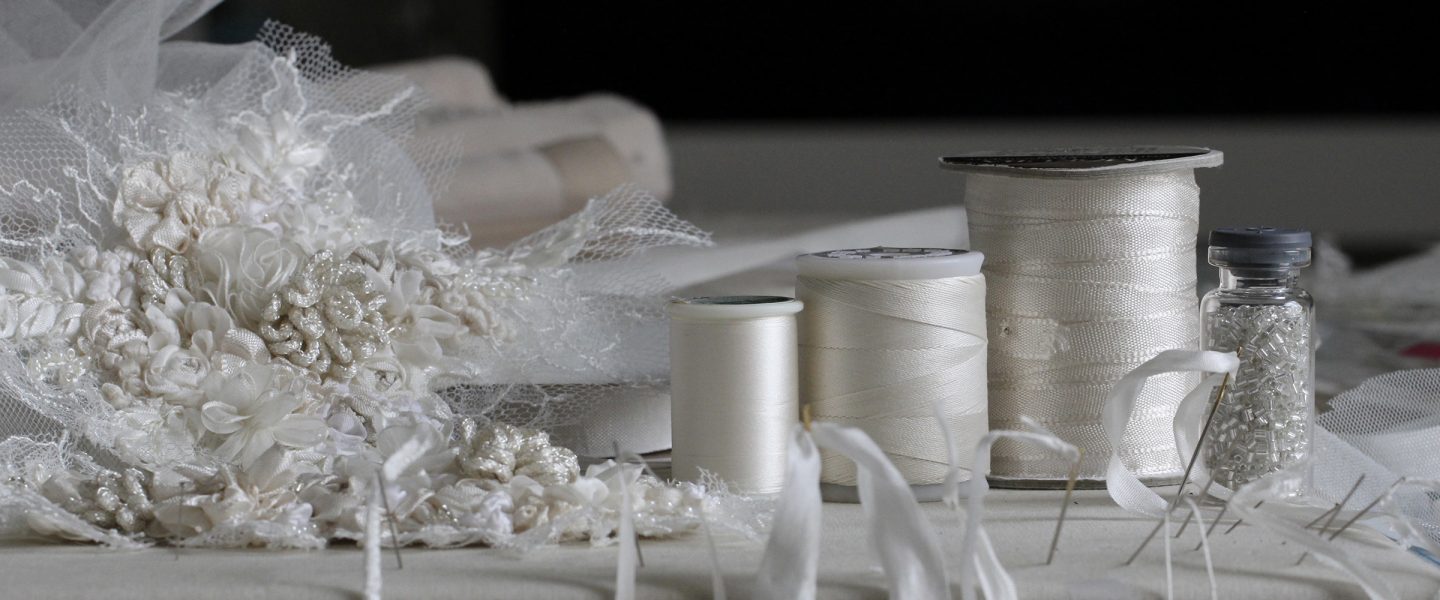
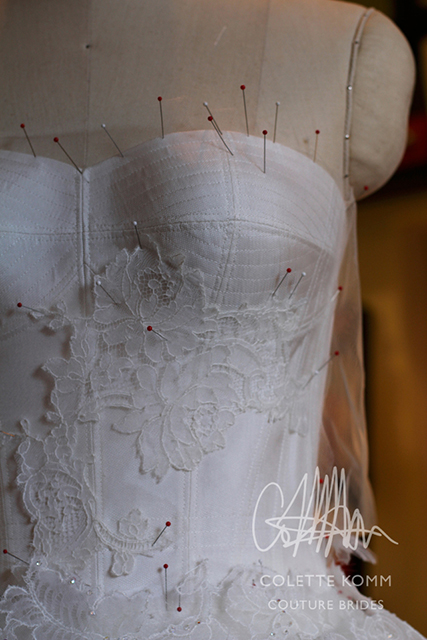
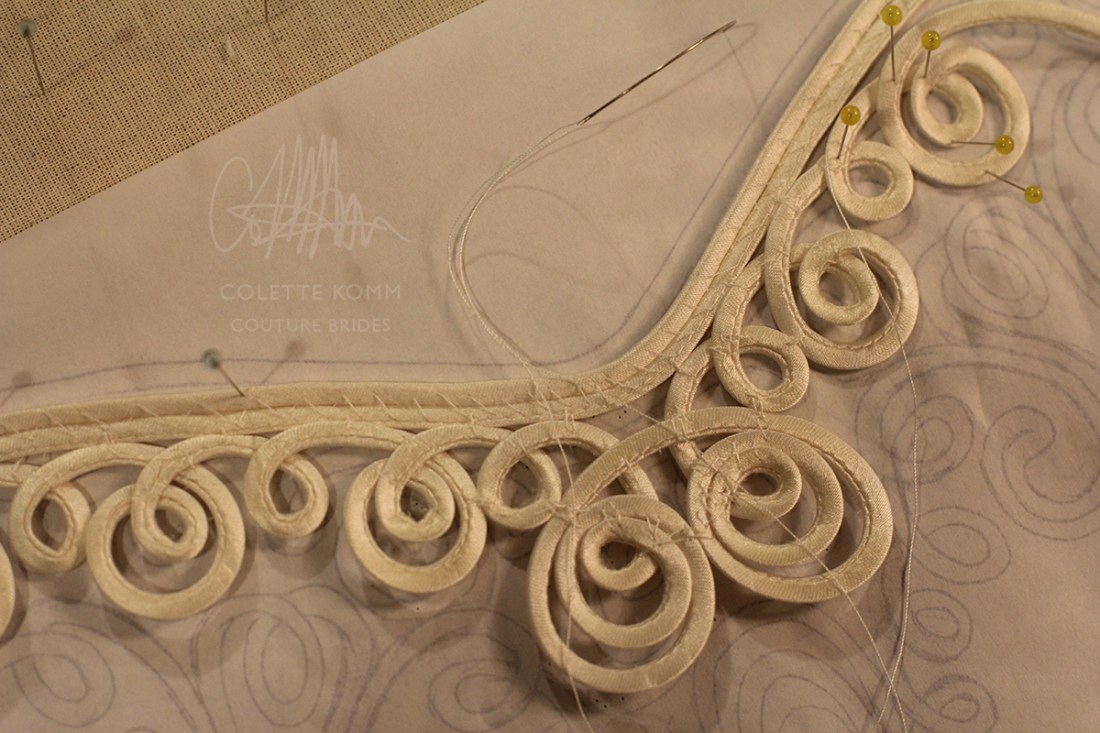 A lot of tracing paper and measuring and design tweaking later, I had the final pattern and was ready for the task I’d been day dreaming about since Avi’s design consultation: sitting at my table, twisting and turning and pinning and stitching countless yards of bias tape by hand, following the pattern I’d drawn. If I’ve ever been in my happy sewing zone this was it!
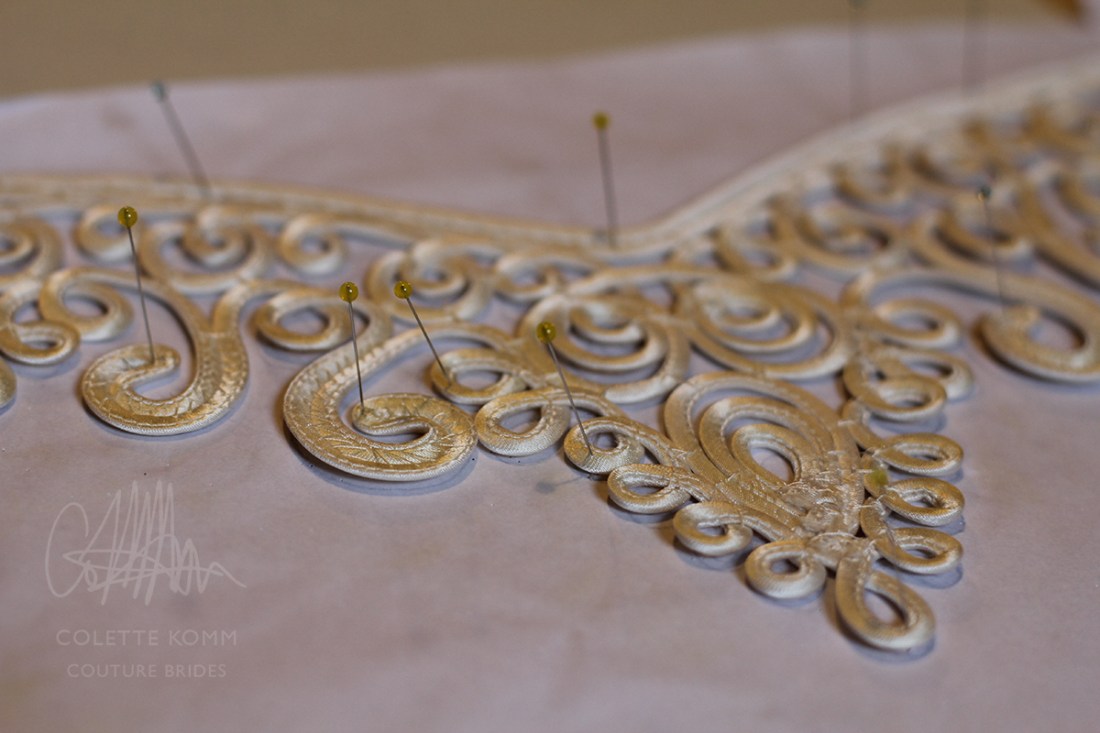


 Avi’s mom flew me down for the wedding to help lace up the corset; she told me she didn’t want to worry about getting it wrong if she tried to do it herself, but moreover, after all the work I’d done to make such a special gown for Avi they couldn’t imagine her wedding without me being there.


 After the ceremony all the guests were taken to the wharf for a surprise riverboat trip down the Savannah River to the reception venue.
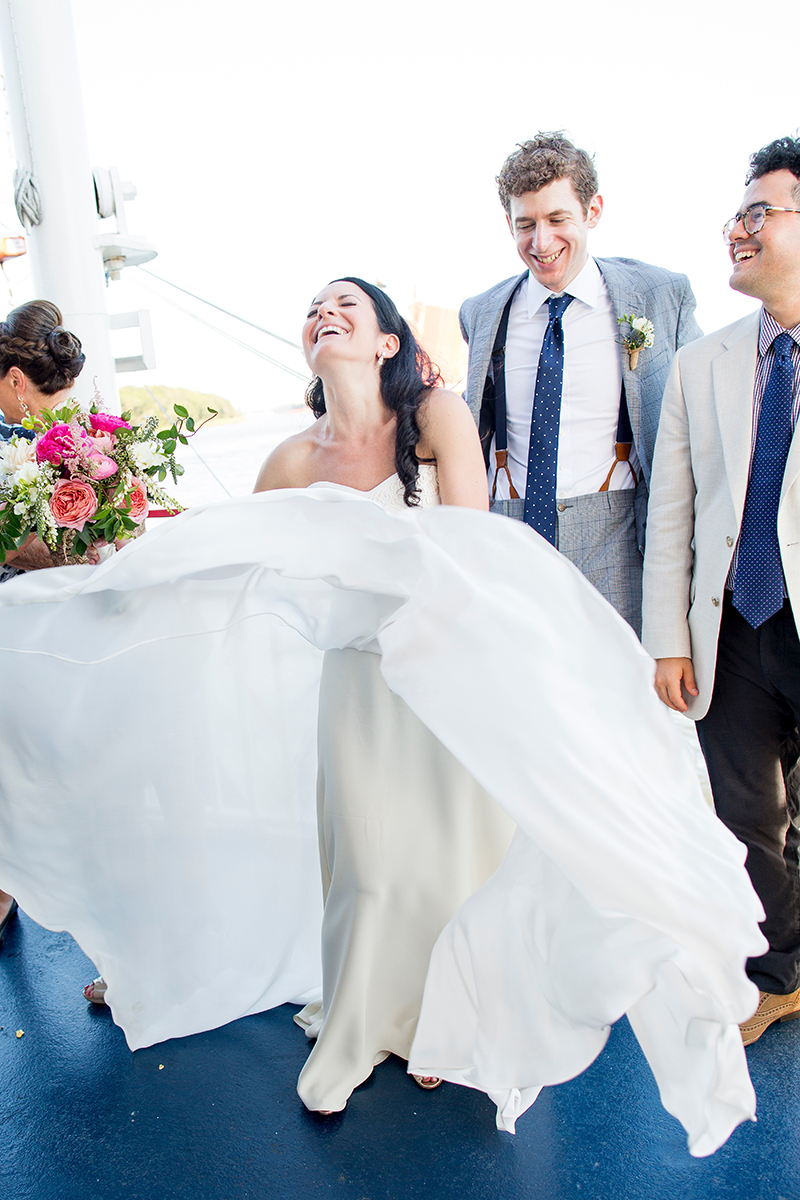


